Section 11 – Right Wing Spar

I worked myself into a corner where I needed a riveting partner to continue riveting the top skins to the left wing so I decided it is time to set the left wing aside and catch up the right.

Thanks to my very understanding wife, the left wing is safely stored in the spare bedroom closet.


On the right wing, I got the J-channels drilled, flange holes final drilled, and the top flange countersinks done.


Workshop Improvements

Not a whole lot of progress on the wing this week because I had the workshop out of commission for electrical and flooring improvements. An electrician came out on Friday and ran 220 for the air compressor, 110 for overhead fluorescent lights, and another 110 circuit for shop equipment. We moved the wing to the spare bedroom to be out of the way of the electrician so while I was at it, I took the opportunity to lay carpet and padding on the workshop side of the garage. I know this is a little non traditional for a workshop but it was an economic way to add some anti-fatigue padding to the floor. We'll see how it works.

As far as the plane goes, I did get about half of the rivets in on the W-00002 inboard wing skin. I can't reach any more without a helper to hold the bucking bar so I'm going to set the left wing aside and start on the right.


Section 14 – Top Skins

I finished up dimpling the top skins today and got the rivet lines primed. I cut a slot in a scrap piece of cardboard to paint the rivet lines in the skin and make it look at least a little bit better than free hand.
IMG 2301

I also primed the wing walk doublers on both sides
IMG 2304


Section 14 – Top Skin

Yesterday I continued working on the inboard and outboard top skins for the left wing. I removed a small amount of material from about 1″ of the forward corner of the inboard and outboard skins where they overlap to help them lay flat. Then after complete deburring, it’s time to dimple.
IMG 2298
I got the top inboard skin dimpled. For the most part, I used the Cleveland spring-back dimple dies in the DRDT-2 but on the holes along the forward edge, I used the smaller Avery die so it wouldn’t flatten the slight bend.

I also added a new fixture to the workshop.
IMG 2299
I built the DRDT-2 table expecting to use it in conjunction with the main workbenches. But of course, they are occupied holding the wing so I need something to support skins while dimpling. I purchased a bench grinder stand from Harbor Freight and added castors. I think it was $40. I then attached a piece of the 3/8 plywood (shipping crate top) and carpet and it is a handy movable surface for supporting the skins. I couldn’t have built anything any cheaper and this will also be useful holding the grinder or band saw.

Section 14 – Wing Walk

No pictures today (because I forgot to take them) but a quick note to say that I finished countersinking the inboard top skin / wing walk doublers. This section of the skin is countersunk because there's two layers of .032 aluminum making it a little thick for dimples. The rest of the top inboard and outboard skins are dimpled and that's the next task.


Section 14 – Preparing Top Skins

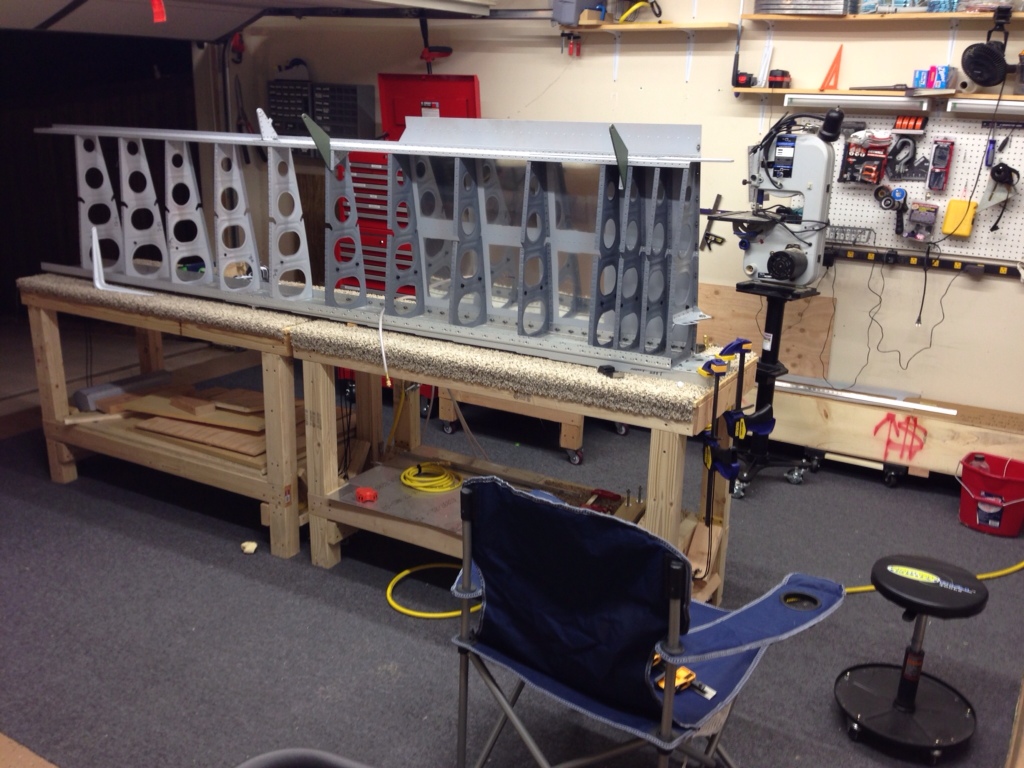
Today I got the 3/8 inch hole reamed in the aft spar thanks to the helping hand of Ashley. Then I got the aft spar riveted onto the ribs. I squeezed most of the rivets but the bottom row of rivets was tough to get to (without a longeron yoke…may need to invest) so I drove those with the gun. In the end, it would have been faster to drive all of them because I wouldn’t have had to mess with new squeezer settings for each different size of rivet. Maybe I’ll do that for the right wing. The third rivet from the top on each rib is left open for attachment of the aileron and flap gap faring.IMG 2287
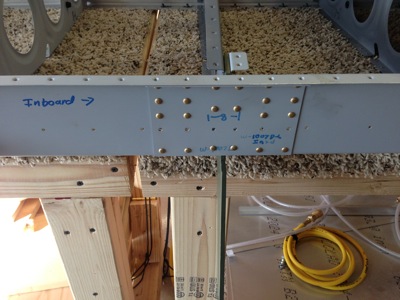
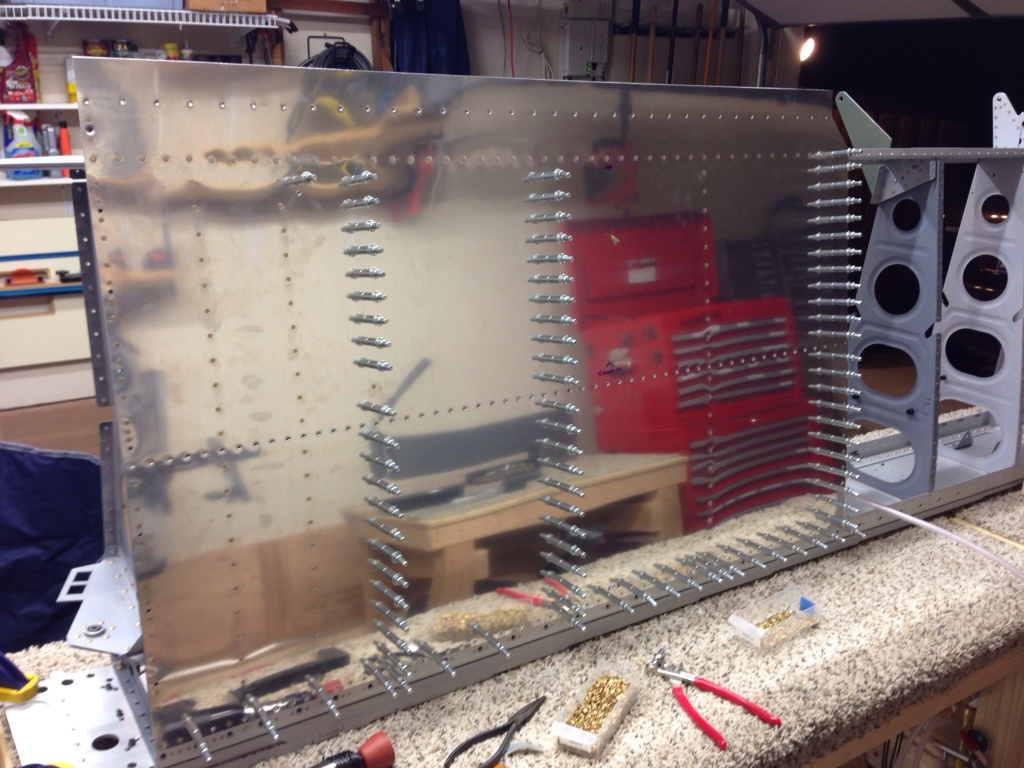
After getting the spar on the ribs, I started on Section 14 by clecoing the wing walk doublers and the inboard top skin onto the wing. This is done so you can match drill the skins with the doublers and to use the skin to match drill the nutplate rivet attach holes into the rib spar.

IMG 2285

I also found where I made a small mistake. It instructs you to dimple all wing ribs LOWER FLANGE back in chapter 12. I dimpled lower and upper flanges. But now on page 14-02, it tells you not to dimple the upper flanges where the wing walk doublers cover the first 4 ribs. This is because the skins are to be machine countersunk in this area. I don’t think this is too big of a deal, I can undimple the few affected holes.


Section 13 – Rear Spar to Wing Rib Hole Alignment

After I clecoed the aft spar to the ribs for test fit, I realized that the middle two holes that mount the 3rd and 4th rib to the aft spar are not lined up with the pre-punched holes in the ribs. IMG 2282
I posted the question with a couple of pictures on =VAF= and got a response from the factory that I need to drill new holes in the rib using the spar as a guide.

Section 13 – Finishing the rear spar

Finished preparing the rear spar doubler plates and aileron brackets this weekend. These parts were then riveted to the rear spar using an assortment of AD4 rivets. The last step that remains before attaching to the wing is to ream the rear spar attachment hole to 3/8 inch. That will have to wait until the reamer I ordered from aircraft spruce comes in this week.


Section 12 – Riveting the Ribs to the Main Spar

Over the past two days, I finished section 12 of the instructions. I started off by assembling the Flap Brackets on the 3rd and 8th ribs as well as the torque tube bracket on the 1st most inboard rib. I then clecoed all of the ribs back onto the spar and torqued the AN3 bolts to the prescribed 28 inch-lbs. Finally, I riveted the ribs to the spar.
IMG 2272


Section 12 – Assembling and Match Drilling Ribs

Today I assembled the flap brackets and match drilled the #30 holes. During this I noticed that one of the W-1025A brackets has a fairly deep gouge in it, apparently a product of the drilling operation at the factory. See the picture below
IMG 2265

IMG 2264

I have sent these pictures to Van’s to ask if this should be polished out or if it needs to be replaced.

Next I mounted the ribs on the spar and match drilled the 30 and 40 sized holes in the rib flanges with the spar. I marked and disassembled the ribs from the spar for priming. I started off using SEM Self Etching Primer but ran out. I then used Nappa 7220 primer which is about 1/3 the cost of SEM but doesn’t go on nearly as smoothly. I may try another brand tomorrow.
IMG 2268